It has been a cool spring so far, winter seems to be hanging on rather, so a comforting warm pudding seemed like a good idea. I rather fancied a ginger pudding, to be eaten with lots of hot custard, very English. Trouble is, most of these sorts of puds are steamed, sometimes for quite a while, and that was rather more than I wanted to be bothered with. However, I came across a recipe that could either be steamed or microwaved. I’ll try the microwave method then; I don’t use the microwave for actual cooking very often
The Recipe:
125 g /4 oz/1 cup all-purpose (plain) flour
1 tsp baking powder
1 large egg
62 g/2 oz/¼ cup butter or margarine, at room temperature
60 ml/ 2 fl oz/¼ cup milk, warmed
2 tbsp brown sugar
80 ml/2¾ fl oz/⅓ cup molasses
2 tsp (or to taste) ground ginger
Sift the flour, baking powder, brown sugar and ginger into a bowl.
Place the milk and molasses into a microwaveable jug and microwave for 30 seconds. Mix together well and set aside to cool to room temperature.
Molasses and milk
Chop the butter into small amounts and rub into the flour mixture until the mixture resembles fine breadcrumbs.
Butter rubbed in
Lightly beat the egg with a fork, then add this to the flour mixture and mix in.
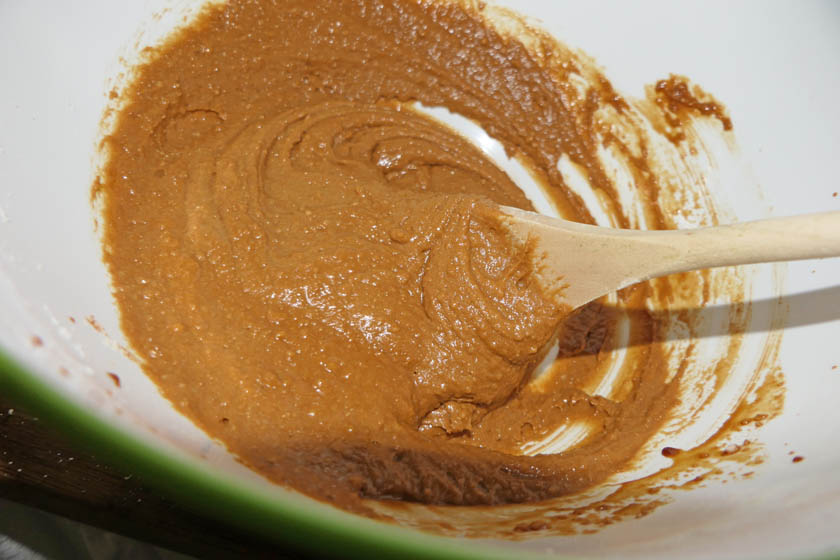
Slowly mix in the molasses mixture and beat until smooth. Transfer into a microwaveable bowl.
Microwave for 4-5 minutes, the sponge is ready when a knife or skewer comes out clean.
Alternatively, place the mixture in a covered bowl and place it in a steamer for 1 hour.
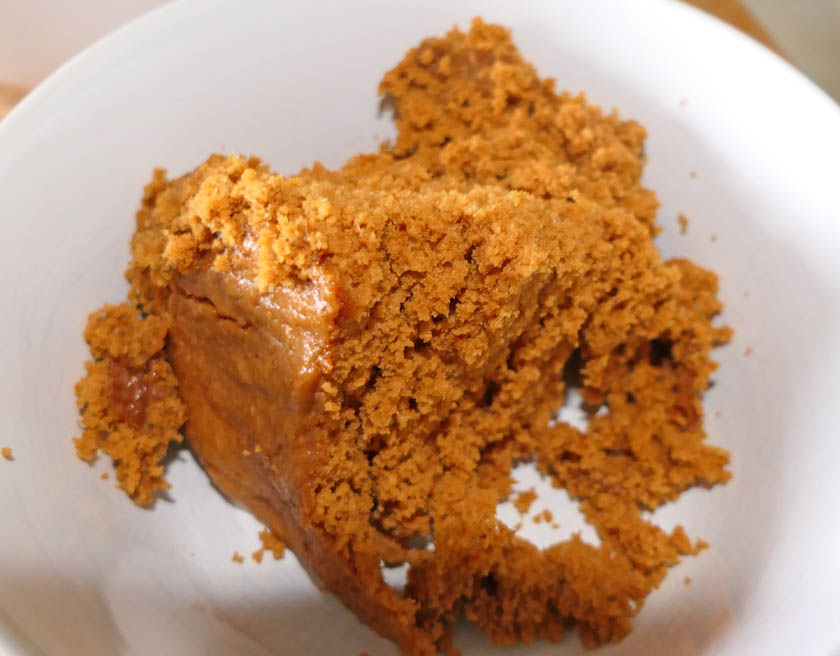
A microwaved sponge always has a slightly different texture to a steamed or baked sponge, but I was pleasantly surprised with the results. There was plenty of sponge to match with custard, and half is in the fridge for today’s dinner. If I was to make it again, I think I would increase the ginger a little, as it was quite mild in this version.
February can be the worst month of the winter, I always think. Still cold, snow even and, just recently almost hurricane-force winds and icy rain. At times like that it’s natural to look for hearty, warming dinners (and never mind the diet!). Comfort food for Brits often revolves around hot puddings, with lashings of custard, and we are nothing if not conventional when it comes to puddings. I was certainly feeling like we needed a dose of comfort to brighten up February.
The problem was, I’m trying not to be tempted into baking, so I’m not keeping things in the store cupboard that would tempt. It would need to be a pudding that could be made from stuff I had in anyway. I remembered an old recipe that might do the trick-Baked Jam Sponge. I’ve had this recipe for years, longer than I’ve known Mark in fact, and it has come out on a semi-regular basis all through the last 30 years. It was originally written on a scrap of paper, so I don’t know where I found it, but I scanned it into my computer some time ago, so at least it is easy to track down. It is really simple to make, very cheap and cheerful, and very warming. It is also quite foolproof-I’ve had all sorts of mishaps with it but it still tastes good-and that’s the main criterion for me!
This is an old recipe, from the UK, so amounts were measured in ounces. I have converted to metric, and suggested cup equivalents, but I’ve never actually tried these so using one of the weight systems would be more accurate (given that, it is very forgiving so it’s probably worth a try!) Also, self-raising flour-you can get it over here, or make your own by adding 1½ tsp baking powder and ¼ tsp salt to 1 cup of all-purpose (plain) flour. Whisk well to distribute the baking powder. You can just use this, as is, or weight out the correct amount from this preparation (I’ve not tried it, myself, I got this from the internet).
The Recipe:
2 oz/60 g/¼ cup/½ stick margarine*, plus additional for greasing the dish
2 oz/60 g/¼ cup caster sugar**
4 oz/ 125 g/ 1 cup self-raising flour
1 egg
Good pinch salt
4 tbsp milk
6 rounded tsp jam***
*I have always used soft margarine (Imperial) for this, it makes for a very quick mixture, but I have no doubt that hard margarine or butter would also work,
**Caster sugar is superfine sugar, although in the absence of either I have used normal North American granulated sugar with good results.
***The jam suggested in the recipe is plum, not often found in our grocery store. I have used damson, strawberry, blueberry and raspberry jam. I would suggest full sugar jam and seedless, for best results.
Preheat oven to 350˚F/180˚C/Gas 4 .
Grease a 1½ pint pie dish with margarine, or butter, and set aside.
Well-greased pie dish
Place all of the ingredients, except the jam, into a large bowl.
Measuring sugarEverything in
Beat together the ingredients until smooth, beat for 1 minute using a wooden spoon or an electric mixer (my preference!).
Beaten mixture
Transfer to the greased pie dish. Place the jam on top of the mixture, smooth as required
Added jam
Transfer to the pre-heated oven for 30 minutes. The pudding is done when the top is golden and a skewer comes out clean. Normally the jam layer migrates through the sponge, leaving a jammy layer on the bottom of the sponge.
This is where it went a bit wrong, this time. I couldn’t bake straight away, because i was already using the oven. The main course of baked salmon and garlic roast potatoes were already in there, and at considerably higher temperature than the sponge wanted. I had to wait until the main course was ready before I could turn the oven down and put the pudding in to bake. Consequently, the temperature was probably a bit high to begin with. Result? the jam didn’t move, probably because the surface baked quicker than it should have done.
Mind you, it didn’t look too dreadful and the sponge baked nicely. It still tasted good.
As I mentioned, it’s best served with lashings of custard, although I think cream would work, too. It seemed to hit the spot. Note to self, maybe bake this first, next time! It should refrigerate and re-heat if the quantity is too large (serves 3-4 standard appetites).
Sometimes I just get the urge to bake, and today the urge was for a coffee cake. I don’t know why, I really don’t make them often. Anyhow, I dug out a recipe from one of my old books for a Mocha Victoria Sponge. One layer coffee-flavoured, one layer chocolate, and slathered in coffee buttercream. That should hit the spot.
This week we have been participating in the South-West Nova Scotia Bioblitz, the aim to find as many species as possible in a defined area-for us this would be the area covered by the Municipality of Barrington, our own municipality, This has meant long days in the field and even longer hours editing and downloading photos to the recording database (iNaturalist, for those interested), so other things (housework, cooking, my artwork, etc.) have all taken a back seat since Monday. Even though we have not yet finished the Bioblitz (two more days to go), I had to scratch that baking urge so, when we got in this evening, I set to to make the cake. I must be mad!
It actually didn’t take too long. The longest bit was greasing and lining the cake tins! These are more from my venerable collection of elderly cake tins, two of a set of three loose-bottomed 8″ sandwich tins. The recipe called for 7″ tins, but I only have one in that size. Must get around to buying another one, some day.
Grease and line two cake pans. I like the loose-bottomed type
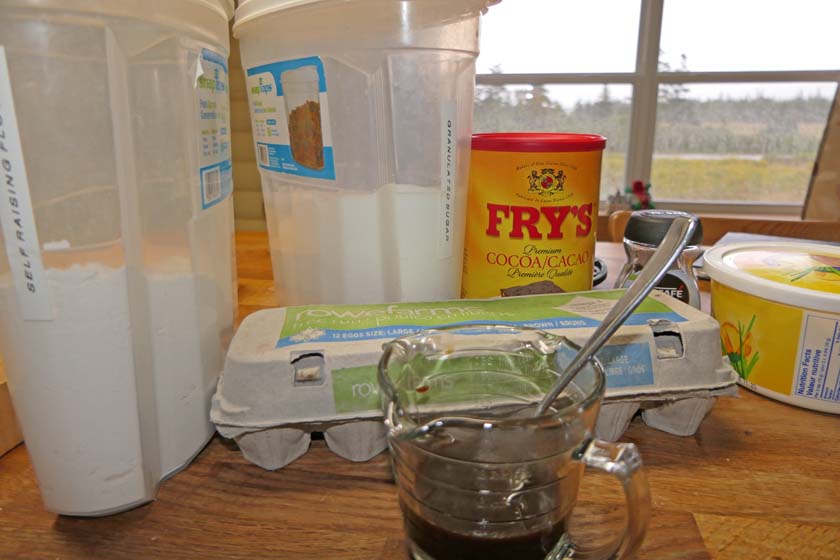
Ingredients are pretty simple, self-raising flour (it’s a UK book, I think, so self-raising flour is often used), caster sugar (standard granulated in North America will do the job), butter (although I used soft margarine), eggs, strong black coffee and cocoa powder:
For the coffee flavour, when we used to have one of those pod coffee machines, I used to brew a strong espresso for this and it worked pretty well. However, we stopped using the pod machine; those pods are pretty unfriendly, environmentally (and purse-wise). Standard filter coffee, as we usually drink, would probably not be strong enough so I keep a very small bottle of instant coffee granules in the cupboard for cake-flavouring purposes. Luckily, it doesn’t go off quickly!
Both the coffee (a good sized heaped teaspoon, or to taste) and the cocoa powder (1 tablespoon) should be dissolved, separately, in 1-2 tbsp of boiling water before adding to the cake mixtures.
The Recipe: for the sponge
175 g/6 oz/ ¾ cup butter or soft margarine
175 g/6 oz/ generous ¾ cup sugar (caster in the UK, granulated in North America)
3 eggs
175 g/ 6 oz/ 1 ½ cups self-raising flour
15 ml, 1 tbsp strong black coffee
15 ml/ 1 tbsp cocoa powder, mixed with 15-30 ml/1-2 tbsp boiling water
for the buttercream
150 g/5 oz/ generous ½ cup butter
275 g/10 oz/ 2 ½ cups icing sugar (powdered or confectioner’s sugar)
15 ml/ 1 tbsp coffee essence or 10ml/2 tsp instant coffee dissolved in 15-30 ml warm milk
Ready for buttercream?
Preheat the oven to 350F/180C/Gas 4 (n.b. I used 350F convection, and it worked fine). Grease and line two cake tins. Note that the recipe suggested just lining the bases but, with the loose-bottom tins I like to fully line them. The recipe suggested 7″ tins; I used 8″ and it worked, but 7″ would give you more depth of sponge.
Cream the butter or margarine with the sugar until light and fluffy. Add the eggs, one at a time, beating between each addition. Fold in the flour.
Divide the mixture into two bowls. Fold the coffee into one bowl and the cocoa into the other.
Either place each mixture into a separate tin (I did it this way, for speed), or add alternate spoonsfuls of each mixture into each tin (that would be fun!).
Ready for the oven!
Bake for 25-30 minutes, until the top springs back when touched, or a toothpick inserted into the centre comes out clean. Remove from the oven, turn out onto a wire rack and leave to cool completely.
Meanwhile, make the buttercream. I used real butter for the buttercream; well, you just have to, really. Beat the butter until soft, gradually beat in all the remaining ingredients.
Sandwich together the two layers with buttercream, spread the remainder on the top and sides, if there is enough to go round. Because my cakes were a little larger than the recipe suggested, I decided to concentrate on a good wodge inside and on top, and leave the sides bare. If you are feeling posh, you can smooth the top and decorate. A coffee glace icing would be nice instead of the buttercream on the top, too, with maybe a few chocolate sprinkles.